Script Panel
const var panel = Content.addPanel("Panel", 0, 0);HISE offers the most important user interface objects (sliders, buttons, text input labels) as ready-made modules for scripted interfaces. However as soon as you need a special type of UI widget or are not satisfied with the built in modules, you can roll your own type by using the generic ScriptPanel .
This guide will contain three chapters:
- An in-depth explanation of the ScriptPanel
- A few best practices
- Some examples to show off what the ScriptPanel can do.
The script panel started out as background panel in order to optically group other UI elements. However it got more and more powerful over the time and evolved to the most complex UI type. If you create a ScriptPanel, you'll still see the original appearance, but the true power of the widget will be unleashed by using three functions:
- the Paint Routine that draws the graphics
- the Mouse Event Callback that reacts to mouse input
- the Timer Callback that is called periodically to implement animations.
They strongly mimic the JUCE API so for people who are familiar with it, adapting it will be pretty straightforward.
The Paint Routine
This is the place where you customize the appearance of the ScriptPanel. You can tell the ScriptPanel to use a custom paint routine by giving it a function with one argument:
Panel.setPaintRoutine(function(g)
{

});
The autocomplete popup should create this function stup automatically. Whenever the Panel needs to be redrawn - which is at compilation and if you call Panel.repaint()
explicitely - it will perform this function to draw on a canvas with the size of the panel.
Calling Panel.repaint()
doesn't execute the function immediately, but just sets a flag that causes the paint routine to be executed asynchronously. This means you can call Panel.repaint()
in the MIDI callbacks without having to bother about performance.
The parameter g
is the Graphics object which will perform the rendering operation you tell it. It is strongly connected to the JUCE internal Graphics object
and provides wrappers for its most important methods:
const var Panel = Content.addPanel("Panel", 0, 0);

Panel.setPaintRoutine(function(g)
{
    g.fillAll(Colours.white); // fills the panel with the colour white)
    g.setColour(Colours.withAlpha(0xffff0000, 0.5)); // Sets the current brush to half transparent red
    g.fillRect([0, 0, this.getWidth(), this.getHeight() / 2]); // fills the upper half of the object with the current brush
});
The best way to learn how to use this function is to grep through the autocomplete popup (type g.
and press enter) and check out what every method does. There are some things to consider:
Colours
Colours are 32bit integer numbers best written in hexadecimal form 0xAARRGGBB
. There is also the colour object with a bunch of constants for some colours and the withAlpha(Colour, alphaValue)
method, which allows to change the transparency of a given colour easily.
Areas / Rectangles
Whenever you need to specifiy an area (eg. for drawing a rectangle or specifying the position of a image), you'll need to pass an array of four values [x, y, width, height]
. These are pixel positions, but you can use a relative positioning by using the dimensions of the panel by multiplying the values with this.getWidth()
and this.getHeight()
.
Be aware that when you change the size of the panel, it will not be rerendered, but the current canvas will be stretched (until you call Panel.repaint()
)
Images
You can use external images to render your ScriptPanel. In order to do this, you'll need to load it as resource during construction and access it in the paint routine using its "pretty name":
// loads the image from the project's Image folder
Panel.loadImage("{PROJECT_FOLDER}sunset.png", "sunset");

Panel.setPaintRoutine(function(g)
{
    g.fillAll(Colours.white);
    g.drawImage("sunset", [0, 0, 200, 200], 0, 0);
    g.drawImage("sunset", [200, 0, 300, 200], 0, 0);
});
It's strongly recommended to put every image in the Images
subfolder and access it through the {PROJECT_FOLDER}
wildcard.
Result:

Important
: The images will scaled down to fit the width
of the area passed in (notice how both calls to draw image have the same height
value but they end up in different sizes. This little trick allows to things:
- Using retina images:
use a image with the double resolution and draw it to a rectangle with half the size. On normal displays it will be downscaled but on retina displays it will use the original resolution. - Using images as filmstrips:
If you want to animate something, make a vertically stitched
filmstrip and use the
y-offsetparameter to clip the painted area to the current animation state.
Of course the downside of this is that you can't change the aspect ratio of the image - but I can't think of a real world usage scenario where this is really required.
Images will share a reference between multiple Panels, so you don't have more memory consumption if you duplicate Panels.
Fonts
You can load custom fonts to draw any text (all TrueType fonts should be supported). If you want to use non standard fonts, you'll need to copy the font into the Image folder of your project and load the font before you use it like this:
// looks in the subdirectory Fonts of the Image folder
Engine.loadFont("{PROJECT_FOLDER}Fonts/Comic Sans MS.ttf");

const var Panel = Content.addPanel("Panel", 0, 0);

Panel.setPaintRoutine(function(g)
{
    g.fillAll(Colours.blanchedalmond);
    g.setColour(Colours.blue);
    g.setFont("Comic Sans MS", 50.0);
    g.drawText("Best font EVER!!", [0, 0, 400, 50]);
});
Result:
When using HISE it will look for the system fonts (it assumes that you've installed the font you want to use), but compiled plugins will embed that font from the image directory and load it from there (you can't expect every user to have Comic Sans MS).
The string passed in as into the g.setFont()
method must match the exact font name (this is not necessarily the file name and this name might be even different between Windows and OSX). A neat trick is to create a dummy label, select the font in the interface designer for the label (as soon as you loaded the font, it should be globally available in the drop down list) and copy the string from the JSON:
const var Label = Content.addLabel("Label", 0, 0);
// [JSON Label]
Content.setPropertiesFromJSON("Label", {
  "fontName": "Trebuchet MS", // use this String to load
  "multiline": false
});
// [/JSON Label]
For fonts that use a different name on OSX and Windows, you can use the Engine.getOS()
command:
inline function getGlobalFontName()
{
    if(Engine.getOS() == "WIN")
    {
        return "WindowsFontID";
    }
    else
    {
        return "OSXFontID";
    }
};
In order to use a different font style by appending either Bold
or Italic
(or both) after the font ID:
g.setFont("Trebuchet MS Bold")Please make sure that you own the full rights to embed fonts into an application as most font licenses handle that case specificly (as far as I am aware, Google Fonts are allowed to be embedded)
Paths
Paths are monochromatic shapes that can be used to build vector-based interfaces. You can either create the Path directly or import an SVG image that was converted using the amazing Projucer's "SVG Path helper".
Paths are designated objects that must be created outside the actual paint function. It can then either be filled or drawn with a given stroke thickness.
const var Panel = Content.addPanel("Panel", 0, 0);

const var p = Content.createPath();

p.startNewSubPath(0.0, 0.0); // start at origin (top-left)
p.lineTo(0.0, 1.0); // add a vertical line
p.quadraticTo(1.0, 1.0, 1.0, 0.0); // add a quadratic curve
p.closeSubPath(); // go back to the origin

Panel.setPaintRoutine(function(g)
{
    g.setColour(Colours.white);

    // draw the path with 10px thickness
    // (make sure it is not clipped by the panels bounds)
    g.drawPath(p, [5, 5, this.getWidth()-10, this.getHeight()-10], 10.0);
});
Paths will be scaled to the given area so it's recommended to use the normalized range 0.0 ... 1.0
for each axis during path creation. You can then use it's getBounds()
method and supply a scale factor to set it to its correct size (take a look at the vector knob example below).
const var Panel = Content.addPanel("Panel", 0, 0);

const var p = Content.createPath();

// pass an array with numbers to load SVG images
p.loadFromData([110,109,0,245,207,67,128,217,36,67,108,0,236,189,67,128,89,69,67,108,0,
                245,207,67,128,217,101,67,108,192,212,207,67,128,53,81,67,98,217,93,211,
                67,51,180,80,67,123,228,219,67,2,123,91,67,128,144,224,67,0,149,101,67,
                98,39,209,224,67,29,247,89,67,79,60,223,67,36,224,61,67,0,245,207,67,0,
                12,54,67,108,0,245,207,67,128,217,36,67,99,109,128,33,193,67,0,168,88,
                67,108,0,66,193,67,0,76,109,67,98,231,184,189,67,77,205,109,67,69,50,
                181,67,126,6,99,67,64,134,176,67,128,236,88,67,98,154,69,176,67,99,138,
                100,67,49,218,177,67,174,80,128,67,128,33,193,67,192,58,132,67,108,128,
                33,193,67,0,212,140,67,108,192,42,211,67,0,40,121,67,108,128,33,193,67,
                0,168,88,67,99,101,0,0]);

Panel.setPaintRoutine(function(g)
{
    g.setColour(Colours.white);
    g.fillPath(p, [0, 0, 50, 50]);
});
This should cover you the most important tools for drawing graphics (for more real world examples keep on reading until the example section). However the panels we created are pretty, but static images. So in order to make them actual UI controls, we need to add logic that reacts on mouse events.
The MouseEvent callback
This can be achieved by passing a mouse callback function to the panel. Again, the autocomplete popup will fill this out for us:
Panel.setMouseCallback(function(event)
{

});
Callback Levels
For every mouse event that is passed to the Panel, this function will be executed with the event parameters as properties of the event
argument object. As you can imagine, there is quite some activity when moving a mouse, so HISE
offers the ability to define different "Callback Levels", which limit the callback execution to only the desired events.
By default, this is deactivated, so in order to use the mouse event callback, you need to set the allowCallbacks
property to one of the following values (the values are actual Strings as shown in the table)
| Callback Level | Events that will trigger the callback |
"No Callbacks"
|
Nothing |
"Context Menu"
|
Nothing (instead it will show a popup menu) |
"Clicks Only"
|
Mouse clicks and releases on the Panel |
"Clicks & Hover"
|
Mouse clicks and entering / leaving the panel (hovering) |
"Clicks, Hover & Dragging"
|
Mouse clicks, entering and leaving (hovering) as well as dragging (= moving the mouse with the left button down) |
"All Callbacks"
|
Mouse clicks, entering and leaving (hovering), dragging and moving the mouse inside the panel |
The recommended way is to limit the event firing to the minimal level that still allows you to implement the desired behaviour (eg. for a simple toggle button that changes its appearance, you only need "Clicks & Hover"
. Not only does it improve the performance, but it also simplifies the code because you don't need to if-out every other event.
Callback Event Properties
Now that we specify when we want to use the callback, we can use the event properties to figure out what we want to do. You can use the autocomplete popup to get a overview of all properties or take a look at this overview:
| Property | Availability | Description | Values |
event.result
|
"Context Menu"
and above |
the index of the selected popup menu item | a number starting from 1
or 0
if the popupmenu was discarded |
event.itemText
|
"Context Menu"
and above |
the name of the currently selected popup menu item |
a String |
event.mouseDownX
|
"Clicks Only"
and above |
The position in the panel where the mouse was pressed | the x-coordinate relative to the panel's space |
event.mouseDownY
|
"Clicks Only"
and above |
The position in the panel where the mouse was pressed | the y-coordinate relative to the panel's space |
event.clicked
|
"Clicks Only"
and above |
indicates if this is a mouse click event | 1
if click event (left or right click), 0
if otherwise (eg. movement or dragging) |
event.doubleClick
|
"Clicks Only"
and above |
indicates if this is a mouse double click event | 1
if double click event, 0
if otherwise (eg. standard click, movement or dragging) |
event.rightClick
|
"Clicks Only"
and above |
indicates if this is a right mouse click event | 1
if right click event, 0
if otherwise (eg. movement or dragging) |
event.mouseUp
|
"Clicks Only"
and above |
indicates if this is a mouse up | 1
if mouse up event (left or right mouse button), 0
if otherwise (eg. click, movement or dragging) |
event.hover
|
"Clicks & Hover"
and above |
indicates if the mouse enters or exits the panel | 1
if enter, 0
if exit. Clicks and all other events will be 1
so you might want to handle them separately. |
event.drag
|
"Clicks, Hover & Dragging"
and above |
indicates if this is a drag event. The drag start will not be a drag event, but a clicked
event |
1
if drag event, 0
if otherwise |
event.dragX
|
"Clicks, Hover & Dragging"
and above |
the distance from the drag start | x-delta in pixels |
event.dragY
|
"Clicks, Hover & Dragging"
and above |
the distance from the drag start | y-delta in pixels |
event.x
|
"All Callbacks"
|
the current mouse position | pixel position relative to the panel space |
event.y
|
"All Callbacks"
|
the current mouse position | pixel position relative to the panel space |
In addition to these properties, you'll also get the current modifier keys that are pressed for the given event:
Modifier Keys:
| Property | Key on Windows | Key on OSX |
event.shiftDown
|
Shift | Shift |
event.cmdDown
|
Ctrl | Cmd |
event.ctrlDown
|
Ctrl | Ctrl |
event.altDown
|
Alt | Apple Key |
You can now implement the logic by using conditions to match the desired event and store data or call other functions for the Panel (the Example section will give you some usage scenarios).
Context Menus
If your UI widgets needs to display a context menu on eg. right click, you don't need to build this by yourself. Instead, you can enable it using the callback level "Context Menu"
(or above) and specify the items with the popupMenuItems"
property (best use the text editor in the interface designer for this).
In order to customize the appearance of the context menu (adding headers, grouping things into submenus, deactivating items), you can use a weird Frankenstein "language"" between C++ and Markdown:
Item 1                        | Normal Item (clickable)
**Header**                    | Section Title (not clickable)
___ (three underscores)       | Separator (not clickable)
~~Deactivated Item~~          | Disabled Item (not clickable)#
MySubMenu::First SubItem      | Item in submenu (clickable)
MySubMenu::**Sub Header**     | Header in submenu (not clickable)
MySubMenu::~~Second SubItem~~ | Disabled item in submenu (not clickable)
This example will produce the following context menu:

You can align the popup menu to the panel width and bottom by setting "popupMenuAlign"
to true (it will otherwise popup at the mouse down position with the minimal width needed to display all text)
The Mouse Event Callback
will then contain the index (one-based, zero means the user clicked somewhere else) as well as the item text so you can implement the logic accordingly.
One thing to keep in mind though that it will count up the integer index only for clickable items and skipping all unclickable items. In the example above, this would mean that since only the Item 1
and the First SubItem
are clickable, Item1
would be associated with the index 1 and First SubItem
would be the index 2 (and not 5 as its index within the full list).
The feature of building customized context menus using this syntax is also available in the Broadcaster.attachToContextMenu()
function as well as if you use a ComboBox with its useCustomPopup
property which will cause the combobox items to be processed with the same logic.
The Timer callback
If you want to animate or delay something, you'll need to give the Panel a timer function:
Panel.setTimerCallback(function()
{
    // Implement the periodic timer callback here...
});
and then call Panel.startTimer(interval)
which will periodicall call the event until you call Panel.stopTimer()
. It's perfectly safe to stop the timer from within the callback (actually this is how most of the animations will work)
Important:
the startTimer()
argument is in milliseconds
(as opposed to Synth.startTimer()
, which is in seconds. Don't ask why :)
Storing Data
In order to make the ScriptPanel a real UI widget, you need the possibility to store data in between the three main function calls. Basically any data that is stored into a panel can be separated into two types:
- UI Data : non persistent data that is used internally to render the graphics or save timer states. Ideally, you would never need to access externally when using the UI widget.
- Control Data
: persistent data that will be stored and recalled when the script is recompiled (or the preset is loaded). This data will be used by the script for any other purpose (controlling parameters etc.) This will also be passed to the
onControlcallback asvalueargument.
For example, a slider with a filmstrip has one Control Data value (the actual value as double number) and some few other UI Data values (eg. current y-offset, alpha value, fine-control mode eg.).
UI Data
Every panel has an object property called data
which can be populated with any values that need to be stored inside the panel. Using it is pretty straightforward, however there is one important rule: Don't access the data via the variable name but through the
this
keyword
:
inline function createPanel(name, x, y)
{
    local widget = Content.addPanel(name, x, y);
    widget.data.alphaValue = 1.0;

    widget.setPaintRoutine(function(g)
    {
        g.fillAll(Colours.withAlpha(Colours.white, this.data.alphaValue));
    });

    return widget;
};

// Create the first panel
const var Panel = createPanel("Panel", 0, 0);

// Set the first alphaValue to 20%
Panel.data.alphaValue = 0.2;

// Create the second panel
const var Panel2 = createPanel("Panel2", 150, 0);
The this
keyword is only meaningful inside the three callbacks, but it allows a totally encapsulated widget.
Values stored in data
are always non-persistent even if the panel has saveInPreset
set to true.
It's heavily recommended to store a simple number whenever possible, but you can choose to use more complex types if your widget demands it (we'll cover this case in a example later on). Even then it might be more efficient to store the possible values as an array in the data
object, and use the Control Value
as an index:
// Not very efficient
this.data.setValue("First Item");

// Better, as it doesn't need to create the string each time
this.data.values = ["First Item", "Second Item", "Third Item"];
this.data.setValue(0);
Control Data
In other UI controls, the control data is the data that actually represents the current value of the widget, which can be set and accessed with the getValue()
and setValue()
methods:
1/0for toggle buttonsdoublenumbers for slider typesintnumbers for discrete widgets like combobox selectors.
Panels also support storing and getting their value with setValue(value)
/ getValue()
, but as a panel is a generic control, this will not be reflected in any way on the UI. Also, panels have saveInPreset
set to false by default. Enabling saveInPreset
on a panel makes it useful as a place to persistently store objects, numbers, or booleans. Strings cannot be saved to Control Data, but can be encapsulated inside an object if circumstances require saving a persistent string.
Snippet demonstrating making a value persistent using a panel:
HiseSnippet 1233.3ocsVs0aiTCE1SaGXSfshUhmQVyKjVhZSBYaK6BhcaZKa.ZaDoag2V43wSGSmXOx1oYip5+Y9G.GamIYRZJKphcdHJ9b86bwmi6ojTlVKUnfpWLImgB97v9SDlzNoDt.08HTvlgmRzFlB6Ic3jbhVyhQAAq+SVBAU1.499qe7PRFQPYyIgPWJ4T1uxGxMyo16U+BOK6DRL6B9vRR29UcoRQGYlbDfm0CafxIzqIWwNiXEasPzaH5TTv1gwMa2L4.JYuCZ1tEk15f8a8c6SYjjD1dMe99sOHocBg1nEJ3SNNlajp9FhgoQAabnLdR+T4Xg2AWx07AYL6gln9fm8jOQlEaCQKUTmTdVbuhDkFAVo27z159z1WFdJOlOi97z2W3XfmqQ4DXvZKBu0W.dMKCuFkf2JfTPIHsgGROKrOUwyMy4XwymE1U.USH8vV.JdYQqsYXXGIHgvryPx0rSTvgYZTqUiF0wMazXqWVEjRKyX6PyXDUMf.T6zFbNQvxv+.tvHj33dVR0hbbhpiAKzXl3CFYLRwhxeniVsHOun5MpumUgpNCrilYpEoI2v5J5oXvon5F0HFHfW9UIPBISCRf2c2KRYE9jRxxF.MXXcpbTVLVJxlfS3JFdbJCXmwoWyhqVUwtBmyTZt1BvKIJ.sQQVi86fnDgAaR4Z7MDEm.EKrQhGvJoQ0R.yFkJYVmottlmy4hozgffKx3BFNYjfZ3.JWRhZT4vbo.LacviYPbea0JPXwduABHgPZrNWC8TrXKRbxTGqkXt4q03wJRdNvgKvDAVN3OYTS0J.v5UJ.AMpcqAr3KhdCKKSBwGCxJtef.UKGxvwDCI5N.u2U8dPdElaJTgbFXQH0LSXK3O2l3Akr9wCXrLwcvWwwuF.w34DlW4f.btd9z+NUqLqOorueYAcZJQbEKtlqcnCYjloe.Sa6Erw2L6sb0ywnbwa2cOjQslDWt+ykzrvDxjJa0XlSrdPCMd3LIIFz9LoA5eRI9PZIw1lj.WC2FDuqfCk+wobZJdHiHzKjAvWwLfQugoFq3FnFf4I3IxQfymTjw3FaKf2R2q9sXXsxNtkuO3X.o3hgB4Jt.tEZY5X8BbD9a..Xmgrfta4agl4aovlCNWTaqpfa.V3kYkjrRdSQaFSsR11MMp+MEqIFMb.SUDiEBBSSWbDc3COht7FDpebVIA8I6yyYhGZuBZ5LP637onBD03Fl+zhg41ZChCir+zPWcB4vKJ3qB+49me1sQ16sQP59Lo6Np6VazcHza6dDbrvzfW.OCUBC2FTAGwtA1S62aTI7Hl9ZiLGV41on1CA9GBHuGjIvtGeRweJeIvRyQ79lbyolzO22YymD5m6sjQ+9UXT+SJt21OXuqLdTFwr3xX6SVlx.J+KrAztkSn4lIkeRy+aan+uBwmE1ianoqFiqsBLBkzOFXb56ZdZ3wvipnl4.bivS9iONOhA8axQFt3pSIFE2V3Oazv9vaAoLv6BnEyd8KXMaOj+bih5eelH1c3uguoLaVzwYY1rfIZHgpjui5udYe4zSbT.LIbuxrB7bW3LtYwEq444gvC4dGktnotmhsdrJ9sOVEa+XU74OVE26wp39OVEO3Cqn8c1udjQNzesAgNs2wtYdAAGKrKFccqn+gNTucwCalling setValue(value)
does not execute the onControl
callback (for safety reasons). Instead you need to explicitely tell the engine to fire the control callback using the method Panel.changed()
Best Practices
Performance Tricks
As long as you don't do anything super complex, the performance should be fine for a fluid UI (and if you don't do anything stupid, it won't affect the audio performance at all). However, there are a few tricks that speed up the graphic rendering that are worth considering:
Deactivate transparency if not needed
By default, the panel is rendered transparently over its parent. However this implicates that the parent must be rerendered too if the panel changes. If you don't have a transparent UI widget, you might want to consider changing the opaque
property to false
which gives the engine the hint that the parent must not be repainted because the child is not transparent. Keep in mind that when you do this on transparent widgets, it will cause graphic glitches.
Limit the repaint rate
If you use a timer for animations, a refresh rate of 30 - 50 ms is enough in most cases (this equals 20 - 30 fps). Increasing the timer rate will not make things more fluid, but just clog the internal message event system.
Use repaintImmediately() for synchronous repainting
If you want to repaint the panel from either its timer callback or a event callback, you might want to use this.repaintImmediately()
instead of this.repaint()
in order to get more fluid animations. This bypasses the internal event queue and directly executes the paint function.
Do not call this method from the MIDI callbacks (or even the onControl callback) as it will cause drop outs...
Use the "Create UI Factory method" tool
If you need to create a UI widget that will be used multiple times, you definitely don't need to write all the code every time you need a new Panel. Instead, you can write a function that creates the Panel, sets the data and callbacks and returns the panel. This function is called Factory Method and is a common paradigm in UI design.
The example shown above already illustrates this design:
// A factory method with the UI ID and the initial position as argument.
inline function createPanel(name, x, y)
{
    // Create a panel and store it as local variable
    // It just passes the function arguments to the actual create method
    local widget = Content.addPanel(name, x, y);

    widget.data.alphaValue = 1.0;

    widget.setPaintRoutine(function(g)
    {
        g.fillAll(Colours.withAlpha(Colours.white, this.data.alphaValue));
    });

    // return the local object. This will transfer the "ownership" to the left side of the equation
    return widget;
};

// Create the panel with the factory method
const var Panel = createPanel("Panel", 0, 0);

const var PanelArray = [];

for(i = 0; i < 7; i++)
{
    // Use the factory method in a loop to create a bunch of vertically aligned panels
    PanelArray[i] = createPanel("Panel"+i, 0, i*50);
}
Fortunately, HISE can automatically create UI factory functions from Panel definitions. In order to use this feature, just create a panel the usual way and after you are finished, select everything related to the panel, right click and choose Create UI Factory method from selection . This transforms something like this:
const var Panel = Content.addPanel("Panel", 125, 12);

Panel.data.bgColour = 0xFF229955;

Panel.setPaintRoutine(function(g)
{
    g.fillAll(this.data.bgColour);
});
to this:
inline function createMonochromaticPanel(name, x, y)
{
    local widget = Content.addPanel(name, x, y);

    widget.data.bgColour = 0xFF229955;

    widget.setPaintRoutine(function(g)
    {
        g.fillAll(this.data.bgColour);
    });
    return widget;
};

const var Panel = createMonochromaticPanel("Panel", 125, 12);
It's heavily recommended to use the syntax createXXX
for the UI Factory method
. This allows the interface designer to drag around the panel just like any other inbuilt widget (however changing the size is not supported, but in most cases you just want to move the widget to the right position). Just test it with the example above, selecting and moving the panel should magically update the arguments to the function call :)
Use namespaces and wrapper functions to hide the internals
In order to make encapsulated widgets, it's recommended to put each widget in its own namespace. Also you might want to create functions that are one abstraction layer above the internal stuff so when you use the widget you don't have to bother how it is implemented.
It is useful to provide at least two functions for the two most important times when you have to interact with the panel: at creation and when handling a control change:
namespace MyFunkyPanel
{
    inline function createMyFunkyPanel(name, x, y)
    { ... };

    inline function handleUpdate(panel, newValue)
    {
        panel.setValue(newValue);
        panel.startTimer(50);
        panel.repaint();
    };
};

function onControl(number, value)
{
    // Don't need to know what the panel is doing internally here...
    MyFunkyPanel.handleUpdate(number, value);
}
Another nice trick is to use a leading underscore to indicate "private" methods and properties of a namespace. While Javascript does not have a strong concept of data encapsulation, this might at least give the user a hint that this functions is not supposed to be used outside the internals.
For a full encapsulation and reusablility experience, you might also want to move the code to an external file and include it in multiple scripts.
Examples
The following examples should demonstrate how to use the ScriptPanel for actual UI widgets. All those examples were actual user requests.
A six state button
The button in HISE can be filmstripped, but just uses two states. Since I am rather lazy about updating the in built widgets, I'd rather use this as an example how to build a really simple UI widget that is virtually indistinguishable from a hardcoded one.
This is the "filmstrip" we'll be using:
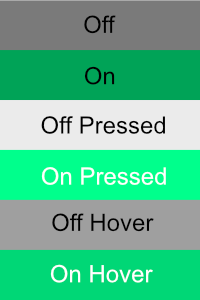
It uses the same order as KONTAKT expects, so we can reuse those images here - thanks Dorian for the explanation :)
Creating the Panel and set its properties
We need the Panel to be 200 pixels wide, store its value persistently, be non transparent and have a stepsize of 1 (this is important for host automation). Use the interface designer to set its properties and you should end up with a JSON property list like this:
// [JSON Panel]
Content.setPropertiesFromJSON("Panel", {
  "width": 200,
  "allowCallbacks": "Clicks & Hover",
  "saveInPreset": true,
  "opaque": true,
  "stepSize": "1"
});
// [/JSON Panel]
The data
Now let's take a look what data we need. The UI data will store the current states (hover and down) as well as the height per filmstrip seperately (so we can use other images). The Control Value will store the "on" and "off" state and will be either 1 or 0.
Whenever we change the button value (either when we click on it or when it gets restored from the preset, we'll be calling the setButtonValue
method to encapsulate the inner behaviour.
Panel.data.down = 0;
Panel.data.hover = 0;
Panel.data.heightPerFilmStrip = 50; // this will be changed when we use another image

inline function setButtonValue(p, value)
{
    p.setValue(value);
    p.repaint();
}
Loading the filmstrip image will be wrapped into a function so it can be easily replaced later:
inline function loadFilmStrip(p, image, heightPerFilmstrip)
{
    p.loadImage(image, "filmstrip");
    p.data.heightPerFilmstrip = heightPerFilmstrip;
};

loadFilmStrip(Panel, "{PROJECT_FOLDER}SixStateButton.png", 50);
Paint Routine
Drawing this panel is pretty easy: just calculate the offset and draw the image:
Panel.setPaintRoutine(function(g)
{
    var offset = this.data.heightPerFilmStrip * this.data.yOffset;
    g.drawImage("filmstrip",[0, 0, this.getWidth(), this.getHeight()], 0, offset);
});
The mouse event callback
We told the panel to fire the callback on click and hover events. In the callback we need to distinguish between those two events and handle them accoringly. We'll be changing the value at the mouse release (this makes the example a bit more readable)
Panel.setMouseCallback(function(event)
{
    if(event.clicked) // Handle mouse clicks
    {
        // set the `down` flag and repaint
        this.data.down = true;
        this.repaint();
    }
    else if(event.mouseUp) // Change the value on mouse up
    {
        // set the `down` flag, change the value and call the onControl callback
        this.data.down = false;
        setButtonValue(this, 1 - this.getValue());
        this.changed();
    }
    else // Handle the hovering
    {
        // set the `hover` flag and repaint
        this.data.hover = event.hover;
        this.repaint();
    }
});
Final Code
That's it. We now have a six state button that we can use. This is the complete code wrapped into a namespace and with some helper methods and example usage:
namespace SixStateButton
{
    inline function createWidget(name, x, y)
    {
        local widget = Content.addPanel(name, x, y);

        Content.setPropertiesFromJSON(name, {
        "width": 200,
        "saveInPreset": 1,
        "allowCallbacks": "Clicks & Hover",
        "opaque": 1,
        "stepSize": "1"
        });

        widget.data.hover = 0;
        widget.data.on = 0;
        widget.data.down = 0;
        widget.data.heightPerFilmStrip = 50;

        widget.setPaintRoutine(function(g)
        {
            var offset = this.getValue() ? 1 : 0;
            if(this.data.down) offset += 2;
            else if(this.data.hover) offset += 4;

            g.drawImage("filmstrip",[0, 0, this.getWidth(), this.getHeight()],
                                    0, offset * this.data.heightPerFilmstrip);
        });

        widget.setMouseCallback(function(event)
        {
            if(event.clicked)
            {

                this.data.down = true;
                this.repaint();
            }
            else if(event.mouseUp)
            {
                this.data.down = false;
                setButtonValue(this, 1 - this.getValue());
                this.changed();
            }
            else
            {
                this.data.hover = event.hover;
                this.repaint();
            }
        });

        return widget;
    };

    inline function loadFilmStrip(p, image, heightPerFilmstrip)
    {
        p.loadImage(image, "filmstrip");
        p.data.heightPerFilmstrip = heightPerFilmstrip;
    };

    inline function update(p, value)
    {
        p.setValue(value);
        p.changed();
        p.repaint();
    }

    inline function setButtonValue(p, value)
    {
        p.setValue(value);
        p.repaint();
    }
};

// Create two buttons
const var b1 = SixStateButton.createWidget("b1", 0, 0);
const var b2 = SixStateButton.createWidget("b2", 300, 0);

// Load the image file
SixStateButton.loadFilmStrip(b1, "{PROJECT_FOLDER}SixStateButton.png", 50);
SixStateButton.loadFilmStrip(b2, "{PROJECT_FOLDER}SixStateButton.png", 50);

function onNoteOn(){}
function onNoteOff(){}
function onController(){}
function onTimer(){}

function onControl(number, value)
{
    // Update the buttons in the onControl callback
    SixStateButton.update(number, value);
}
A ButtonPack

There is the SliderPack widget for an array of sliders that can represent a lookup table, but what if we need an array of buttons that can be changed by dragging the mouse over them? Setting the SliderPack range to 0...1 does not work to our full satisfaction. Again, it's ScriptPanel time.
We'll be starting with the most naive implementation of this widget and change it until it meets our UX expectations.
We'll keep an array of N
bool values that contains each button state. Then we'll vertically divide the ButtonPack into N
equal rectangles (the buttons) and draw them according to their state Whenever we drag the mouse over the area of a button, we'll be toggling the array and update everything. We don't need any filmstrips, instead we render the whole thing completely scalable.
Creating the Panel and its Properties
const var Panel = Content.addPanel("Panel", 0, 0);
// [JSON Panel]
Content.setPropertiesFromJSON("Panel", {
  "width": 380,
  "height": 50,
  "allowCallbacks": "Clicks, Hover & Dragging",
  "opaque": true
});
// [/JSON Panel]

this.data.bgColour = Colours.white;
this.data.offColour = Colours.black;
this.data.onColour = Colours.red;

inline function setNumButtons(p, numButtons)
{
    // Reset the array
    p.data.buttonValues = [];

    for(i = 0; i < numButtons; i++)
    {
        // Fill the button values randomly for starters
        p.data.buttonValues[i] = Math.randInt(0, 2);
    }
}

setNumButtons(Panel, 16);
We also made a function that allows changing the number of buttons. Notice how we don't define the array outside of the function: the array will created only when calling this function (before it's undefined
)
We also filled the button states with random values in order to have something for the paint routine. This will be of coursed replaced by zeroing the array later...
ButtonPack Paint Routine
This is the most simple implementation of our ButtonPack's paint function:
Panel.setPaintRoutine(function(g)
{
    var numButtons = this.data.buttonValues.length;
    var buttonWidth = (this.getWidth()-1) / numButtons;

    g.fillAll(this.data.bgColour);

    for(i = 0; i < numButtons; i++)
    {
        g.setColour(this.data.buttonValues[i] ? this.data.onColour : this.data.offColour);

        // We'll need to subtract 1 on each side to have a "border"
        g.fillRect([1 + i*(buttonWidth), 1, buttonWidth-1, this.getHeight()-2]);
    }
});
There is a little issue with this paint routine: the borders get blurred. This is caused by having non-integer button widths which cause some lines to be between two pixels and get antialiased. There are two solutions to the problem:
- Change the paint routine to round the button widths. This will lead to empty space at the right side of the button pack if you don't use a matching width.
- Expect the user to use a width that doesn't create blurred lines (in this case, the width must be
x*16 + 1(eg. 65, 129, 513...)
Solution 1 would not be hard to implement, but it will make the code less readable so for the sake of this tutorial, we'll go with number 2.
3.2.3 The Mouse Event callback
This time we chose the "Click, Drag & Hover"
callback level because we want to allow dragging over the ButtonPack and allow multiple buttons to be toggled without clicking each time (this is the whole reason for this widget, otherwise we could just have created an array of buttons).
First we'll create a bunch of helper functions that we need later on:
// Returns the button index for the given x position.
inline function getButton(p, x)
{
    // Calculate the proportion of the x position
    local xNormalized = x / p.getWidth();

    // Calculate the array index by rounding it down.
    local index = Math.floor(p.data.buttonValues.length * xNormalized);
    return index;
}

// Inverts the button with the given index
inline function toggleButton(p, index)
{
    this.data.buttonValues[index] = 1 - this.data.buttonValues[index];
    handleUpdate(p);
    this.changed();
}

// Sets the array as Control Value and repaints the panel
inline function handleUpdate(p)
{
    this.setValue(this.data.buttonValues);
    this.repaint();
}
Now we can write the event callback:
Panel.setMouseCallback(function(event)
{
    if(event.clicked)
    {
        // Toggle the button on mouse click
        toggleButton(this, getButton(this, event.mouseDownX));
    }
    else if(event.drag)
    {
        // You'll need to calculate the current position
        var x = event.mouseDownX + event.dragX;
        toggleButton(this, getButton(this, x));
    }
});
Now there is one serious problem: the buttons are flickering when you drag the mouse. This is because it toggles the button everytime a mouse drag event is received. In order to fix this behaviour, we'll need to keep track of the most recently changed button and prevent toggling until a new button is used:
Panel.data.lastDraggedIndex = -1;

Panel.setMouseCallback(function(event)
{
    if(event.clicked)
    {
        this.data.lastDraggedIndex = getButton(this, event.mouseDownX);
        toggleButton(this, this.data.lastDraggedIndex);
    }
    else if(event.drag)
    {
        var x = event.mouseDownX + event.dragX;
        var newDraggedIndex = getButton(this, x);

        if(newDraggedIndex != this.data.lastDraggedIndex)
        {
            this.data.lastDraggedIndex = newDraggedIndex;
            toggleButton(this, this.data.lastDraggedIndex);
        }
    }
});
That's better. We can now drag the mouse to change multiple buttons at once. However the toggle behaviour is a bit irritating, we'd rather want to use the value of the clicked button for all other button values. In order to do this, we'll add another helper function that allows us to set the button value directly and add a downValue
property to the data object to store the value of the first button:
inline function setButtonValue(p, index, value)
{
    p.data.buttonValues[index] = value;
    handleUpdate(p);
}

Panel.data.downValue = 0;

Panel.setMouseCallback(function(event)
{
    if(event.clicked)
    {
        this.data.lastDraggedIndex = _getButton(this, event.mouseDownX);

        toggleButton(this, this.data.lastDraggedIndex);
        this.data.downValue = this.data.buttonValues[this.data.lastDraggedIndex];
    }
    else if(event.drag)
    {
        var newDraggedIndex = _getButton(this, event.mouseDownX + event.dragX);

        if(newDraggedIndex >= this.data.buttonValues.length)
            return;

        if(newDraggedIndex != this.data.lastDraggedIndex)
        {
            this.data.lastDraggedIndex = newDraggedIndex;
            setButtonValue(this, this.data.lastDraggedIndex, this.data.downValue);
        }
    }
});
Now we are almost finished. The last thing we want to add is the ability to enable / disable all buttons at once by shift clicking on a button:
// Sets all buttons to the given value
inline function setAllButtonValues(p, value)
{
    for(i = 0; i < p.data.buttonValues.length; i++)
    {
        p.data.buttonValues[i] = newValueForAll;
    }

    updateInternal(p);
}

// MouseEvent callback:
if(event.clicked)
{
    this.data.lastDraggedIndex = getButton(this, event.mouseDownX);

    if(event.shiftDown)
    {
        var newValueForAll = 1 - this.data.buttonValues[this.data.lastDraggedIndex];

        setAllButtonValues(this, newValueForAll);
        this.data.downValue = newValueForAll;
    }
    else
    {
        toggleButton(this, this.data.lastDraggedIndex);
        this.data.downValue = this.data.buttonValues[this.data.lastDraggedIndex];
    }
}
Handling the Control Data
The Control Data must be the whole value array in order to allow correct restoring of presets. This makes things a bit more complicated than just using a simple number, but with a little caretaking, this should be no problem.
So whenever we change the button values, we call setValue()
with the data.buttonValues
array as argument. Luckily, Javascript doesn't clone the array, but only passes in a reference to the buttonValue
array, so our update function can do just opposite and store the value
from the onControl callback in the data.buttonValue
property.
Remember that the restoring of UI controls in HISE works by calling the onControl
callback of every widget that has its saveInPreset
property enabled just after compiling or preset load.
However there is one case where it gets complicated and this is when the length of the both arrays don't match which happens at first initialisation:
- You create a Panel
- You sets its button amount to eg. 16 which causes the
data.buttonValuesarray to grow to 16. - After the
onInitcallback, the Panel gets an empty array asvaluefrom the onControl callback - The array gets copied over to the
data.buttonValueproperty effectively rendering thesetNumButtonscall useless.
In order to fix this, we'll need to specificly handle this case and copy the values manually when the sizes don't match:
/** Call this from the onControl callback. */
inline function update(p)
{
    if(p.getValue().length == p.data.buttonValues.length)
    {
        // Just copy the reference if the sizes match
        p.data.buttonValues = p.getValue();
    }
    else
    {
        // Only copy as much values as the smallest array's size
        local numToCopy = Math.min(p.getValue().length, this.data.buttonValues.length);

        for(i = 0; i < numToCopy; i++)
            p.data.buttonValues[i] = p.getValue()[i];
    }

    p.repaint();
}
Final Code
This is the complete code for the ButtonPack. Feel free to use, modify and distribute as you like:
/** The ButtonPack is a set of horizontally aligned buttons which
*   can be toggled by dragging over them.
*
*   Usage:
*
*   1. Create the ButtonPack using ButtonPack.createButtonPack(name, x, y);
*   2. Set the number of buttons
*      (For a optimal appearance, use a width of `numButtons*N + 1`)
*   4. Set the colours using ButtonPack.setColour() and the given colour IDs
*   5. In the onControlCallback, call ButtonPack.update(panelToUpdate) to refresh the
*      display
*   6. The onControl callback will contain the button states as array.
*/
namespace ButtonPack
{
    // Colour IDs:

    const var BackgroundColourId = 0;
    const var ButtonOnColourId = 1;
    const var ButtonOffColourId = 2;

    /** Creates a ButtonPack. */
    inline function createButtonPack(name, x, y)
    {
        local widget = Content.addPanel(name, x, y);

        Content.setPropertiesFromJSON(name, {
        "width": 513,
        "height": 32,
        "allowCallbacks": "Clicks, Hover & Dragging",
        "saveInPreset": true,
        "opaque": 1
        });

        widget.data.lastDraggedIndex = -1;
        widget.data.downValue = 0;

        widget.setPaintRoutine(function(g)
        {
            var numButtons = this.data.buttonValues.length;
            var buttonWidth = (this.getWidth()-1) / numButtons;

            g.fillAll(Colours.white);

            for(i = 0; i < numButtons; i++)
            {
                g.setColour(this.data.buttonValues[i] ? Colours.red : Colours.black);
                g.fillRect([1 + i*(buttonWidth), 1, buttonWidth-1, this.getHeight()-2]);
            }

            g.setColour(Colours.withAlpha(0xFFFFFFFF, 0.1));
            g.fillRect([1 + this.data.hoverIndex*(buttonWidth), 1, buttonWidth-1, this.getHeight()-2]);
        });

        widget.setMouseCallback(function(event)
        {
            if(event.clicked)
            {
                this.data.lastDraggedIndex = _getButton(this, event.mouseDownX);

                if(event.shiftDown)
                {
                    var newValueForAll = 1 - this.data.buttonValues[this.data.lastDraggedIndex];

                    _setAllButtonValues(this, newValueForAll);
                    this.data.downValue = newValueForAll;
                }
                else
                {
                    _toggleButton(this, this.data.lastDraggedIndex);
                    this.data.downValue = this.data.buttonValues[this.data.lastDraggedIndex];
                }
            }
            else if(event.drag)
            {
                var newDraggedIndex = _getButton(this, event.mouseDownX + event.dragX);

                if(newDraggedIndex >= this.data.buttonValues.length)
                    return;

                if(newDraggedIndex != this.data.lastDraggedIndex)
                {
                    this.data.lastDraggedIndex = newDraggedIndex;
                    _setButtonValue(this, this.data.lastDraggedIndex, this.data.downValue);
                }
            }
        });

        return widget;
    };

    /** Sets the amount of buttons. */
    inline function setNumButtons(p, numButtons)
    {
        // Reset the array
        p.data.buttonValues = [];

        for(i = 0; i < numButtons; i++)
            p.data.buttonValues[i] = 0;
    }

    /** Call this from the onControl callback. */
    inline function update(p)
    {
        if(p.getValue().length == p.data.buttonValues.length)
        {
            p.data.buttonValues = p.getValue();
        }
        else
        {
            local numToCopy = Math.min(p.getValue().length, this.data.buttonValues.length);

            for(i = 0; i < numToCopy; i++)
                p.data.buttonValues[i] = p.getValue()[i];
        }

        p.repaint();
    }

    // Changes the colour for the buttons
    inline function setColour(p, colourId, colour)
    {
        switch(colourId)
        {
            case ButtonPack.BackgroundColourId: p.data.bgColour = colour; break;
            case ButtonPack.ButtonOnColourId: p.data.onColour = colour; break;
            case ButtonPack.ButtonOffColourId: p.data.offColour = colour; break;
        }
    }

    // Sets the array as Control Value and repaints the panel
    inline function _updateInternal(p)
    {
        p.setValue(p.data.buttonValues);
        p.repaint();
        p.changed();
    }

    // @internal
    inline function _toggleButton(p, index)
    {
        p.data.buttonValues[index] = 1 - p.data.buttonValues[index];
        _updateInternal(p);
    }

    // @internal
    inline function _setButtonValue(p, index, value)
    {
        p.data.buttonValues[index] = value;
        _updateInternal(p);
    }

    // @internal
    inline function _setAllButtonValues(p, value)
    {
        for(i = 0; i < p.data.buttonValues.length; i++)
            p.data.buttonValues[i] = newValueForAll;

        _updateInternal(p);
    }

    // @internal
    inline function _getButton(p, x)
    {
        local xNormalized = x / p.getWidth();
        local index = Math.floor(p.data.buttonValues.length * xNormalized);
        return index;
    }
};
A infinitely rotatable head

A slider has a fixed range but what if you want to implement an infinitely rotatable head? After the last example, this is a rather easy exercise for us, so I'll skip to the final code with some comments where applicable:
/** Creates a inifinitely rotatable head. */
inline function createHeadSprite(name, x, y)
{
    local widget = Content.addPanel(name, x, y);

    Content.setPropertiesFromJSON(name, {
      "width": 200,
      "height": 200,
      "saveInPreset": true,
      "allowCallbacks": "Clicks, Hover & Dragging"
    });

    // Kindly provided by Elan Hickler :)
    widget.loadImage("{PROJECT_FOLDER}headsprite.png", "filmstrip");

    widget.setPaintRoutine(function(g)
    {
        // Calculate the index (the filmstrip has 100 slices, each 200px high
        var index = parseInt(this.getValue()*100.0);

        g.drawImage("filmstrip", [0, 0, this.getWidth(), this.getHeight()], 0, index * 200);
    });

    // This is the sensitivity of the rotation
    widget.data.sensitivity = 300;

    // Save the down value as reference for all drag deltas
    widget.data.downValue = 0.0;

    widget.setMouseCallback(function(event)
    {
        if(event.clicked)
        {
            // Store the current value for reference when dragging
            widget.data.downValue = this.getValue();
        }

        if(event.drag)
        {
            // Use both axis to allow diagonal drag behaviour
            var delta = event.dragX + -1.0 * event.dragY;

            // normalize the delta using the given sensitivity
            var deltaNormalized = delta / this.data.sensitivity;

            // Calculate the new value and truncate it to 0...1
            var newValue = this.data.downValue + deltaNormalized;
            newValue = newValue - Math.floor(newValue);

            // Update the panel
            this.setValue(newValue);
            this.changed();
            this.repaint();
        }
    });

    return widget;
};
A vectorized knob
Using the ScriptPanel with a Path and its new addArc
method, you can create fully resizable knobs using only vector graphics.
inline function createVectorKnob(name, x, y)
{
    local widget = Content.addPanel(name, x, y);

    Content.setPropertiesFromJSON(name, {
      "width": 50,
      "height": 50,
      "saveInPreset": 1,
      "allowCallbacks": "Clicks, Hover & Dragging",
      "enableMidiLearn": true
    });

    widget.data.p = Content.createPath();

    widget.setPaintRoutine(function(g)
    {
        // this is the start radian
        var startOffset = 2.5;

        var arcThickness = 0.15;
        var arcWidth = 1.0 - 2.0 * arcThickness;

        // Make sure you reset the path!
        this.data.p.clear();

        g.setColour(Colours.white);

        // Draw the inner circle
        g.fillEllipse([0.3*this.getWidth(), 0.3*this.getWidth(), 0.4*this.getWidth(), 0.4*this.getWidth()]);

        // Calculate the normalized value (in case the range is different from 0...1)
        var min = this.get("min");
        var max = this.get("max");
        var normalizedValue = (this.getValue() - min) / (max - min);

        // calculate the end radian from the current value
        var endOffset = -startOffset + 2.0 * startOffset * normalizedValue;

        // make sure the zero value draws a tiny fraction of the arc
        endOffset = Math.max(endOffset, -startOffset + 0.1);

        // Add the arc with the given area and its offsets in radian (0 ... 2*PI)
        this.data.p.addArc([arcThickness, arcThickness, arcWidth, arcWidth], -startOffset, endOffset);
        g.setColour(Colours.white);

        // this new method returns the scaled bounds with the correct ratio
        var pathArea = this.data.p.getBounds(this.getWidth());

        // draws the arc (use the area from above to avoid weird rescaling)
        g.drawPath(this.data.p, pathArea, this.getWidth() * arcThickness);
    });

    widget.setMouseCallback(function(event)
    {
        if(event.clicked)
        {
            // save the value from the mouse click
            this.data.downValue = this.getValue();
        }
        if(event.drag)
        {
            // Calculate the distance using diagonal drag support
            var dragDistance = event.dragX + -1.0 * event.dragY;

            // Calculate the sensitivity value based on the value range
            var dragSensitivity = 200 / (this.get("max") - this.get("min"));

            var normalizedDistance = dragDistance / dragSensitivity;

            // Calculate the new value (limit it to the given range)
            var newValue = Math.range(this.data.downValue + normalizedDistance, this.get("min"), this.get("max"));

            // Ignore the mouse events above the limits
            if(newValue != this.getValue())
            {
                // Change the value
                this.setValue(newValue);

                // Call the paint method
                // unlike repaint, this is a bit faster, but call this only
                // in either the mouse callback or the timer callback of the panel
                this.repaintImmediately();

                // this method triggers the control callback
                this.changed();
            }
        }
    });

    return widget;
};

// Usage:
const var Panel = createVectorKnob("Panel", 0, 0);